
My First Assembly

In this chapter, we're going to create our first assembly. In this example, we will use the flange part from the chapter before to create an assembly. We will add the flange twice to the assembly and add a bolt and a nut. Both parts come from a library and already contain coordinate systems for assembling. Create a copy of templateCreator.ts in the history folder and name it.

So let's start coding!

  1. Create the root assembly and load products
  2. Add the products to the assembly
  3. Adding constraints to the instances

1. Create the root assembly and load products#

First, we create an empty assembly; it will be the root assembly. As explained in the beginning, we will add the flange twice, then a bolt and a nut. So we need to load these products into the assembly as arraybuffer. The bolt and the nut can be found in buerli-examples in the folder client/src/resources/history/Flange. Next, add the flange part saved in native file format to this directory. Use the following snippet in your template.

// import of models of native file format
import flangeAB from '../../resources/history/Flange/FlangePrt.ofb'
import boltAB from '../../resources/history/Flange/Bolt_M22.ofb'
import nutAB from '../../resources/history/Flange/Nut_M22.ofb'
// Create the root assembly
const root = await api.createRootAssembly('FlangeAsm')
// Load all needed products
const [flange] = await api.loadProduct(flangeAB, 'ofb')
const [bolt] = await api.loadProduct(boltAB, 'ofb')
const [nut] = await api.loadProduct(nutAB, 'ofb')
return root

You won't see anything on the screen; we just loaded the products but didn't add any instance yet. So let's go to the next chapter.


2. Add the products to the assembly#

Next, we add two instances of the flange part, then an instance of the bolt, and finally a nut instance to the assembly. We then retrieve the necessary work coordinate systems (WCS) from the parts to connect the instances using 3d constraints. Coordinate systems, also called mates, are used for positioning the instances in the assembly relative to each other. Copy the following code snippet to your template.

const origin = { x: 0, y: 0, z: 0 }
const xDir = { x: 1, y: 0, z: 0 }
const yDir = { x: 0, y: 1, z: 0 }
if (flange && bolt && nut) {
// Get all necessary work coordinate systems
const [wcsCenter] = await api.getWorkGeometry(flange, CCClasses.CCWorkCSys, 'WCSCenter')
const [wcsHole1Top] = await api.getWorkGeometry(flange, CCClasses.CCWorkCSys, 'WCSBoltHoleTop')
const [wcsBoltHead] = await api.getWorkGeometry(bolt, CCClasses.CCWorkCSys, 'WCSHead')
const [wcsNut] = await api.getWorkGeometry(nut, CCClasses.CCWorkCSys, 'WCSNut')
// Add the products as instances to the root assembly
const [flange1Instance, flange2Instance, boltInstance, nutInstance] = await api.addInstances(
{
productId: flange,
ownerId: root,
transformation: [origin, xDir, yDir],
},
{
productId: flange,
ownerId: root,
transformation: [origin, xDir, yDir],
},
{
productId: bolt,
ownerId: root,
transformation: [origin, xDir, yDir],
},
{
productId: nut,
ownerId: root,
transformation: [origin, xDir, yDir],
},
)
}
return root

As result you should see the following graphics. All instances have been added to the origin. We can't even see the two flanges, because they have exactly the same position.

drawing

Added all necessary instances to assemble them

As you probably expect, we have to fix the postions by adding constraints to the instances.


3. Adding constraints to the instances#

Depending on the constraints we set, the instances will have different degrees of freedom. In our example we will simply use the fastened origin and the fastened constraint. We will follow the next steps to constrain the whole assembly.

  • Create a fastened origin constraint to fasten the first flange to the origin
await api.createFastenedOriginConstraint(
root,
{
matePath: [flange1Instance],
wcsId: wcsCenter,
flip: FlipType.FLIP_Z,
reoriented: ReorientedType.REORIENTED_0,
}, 0, 0, 0, 'FOCFlange1',
)
  • Create a fastened constraint between the first and the second flange
await api.createFastenedConstraint(
root,
{
matePath: [flange1Instance],
wcsId: wcsCenter,
flip: FlipType.FLIP_Z,
reoriented: ReorientedType.REORIENTED_0,
},
{
matePath: [flange2Instance],
wcsId: wcsCenter,
flip: FlipType.FLIP_Z_INV,
reoriented: ReorientedType.REORIENTED_180,
},
0,0,0, 'FCFlange1Flange2'
)
  • Create a fastened constraint between the bolt and the first flange
await api.createFastenedConstraint(
root,
{
matePath: [flange1Instance],
wcsId: wcsHole1Top,
flip: FlipType.FLIP_Z,
reoriented: ReorientedType.REORIENTED_0,
},
{
matePath: [boltInstance],
wcsId: wcsBoltHead,
flip: FlipType.FLIP_Z,
reoriented: ReorientedType.REORIENTED_0,
},
0,0,0, 'FCFlange1Bolt'
)
  • Create a fastened constraint between the nut and the second flange
await api.createFastenedConstraint(
root,
{
matePath: [flange2Instance],
wcsId: wcsHole1Top,
flip: FlipType.FLIP_Z,
reoriented: ReorientedType.REORIENTED_0,
},
{
matePath: [nutInstance],
wcsId: wcsNut,
flip: FlipType.FLIP_Z_INV,
reoriented: ReorientedType.REORIENTED_0,
},
0,0,0, 'FCFlange2Nut'
)

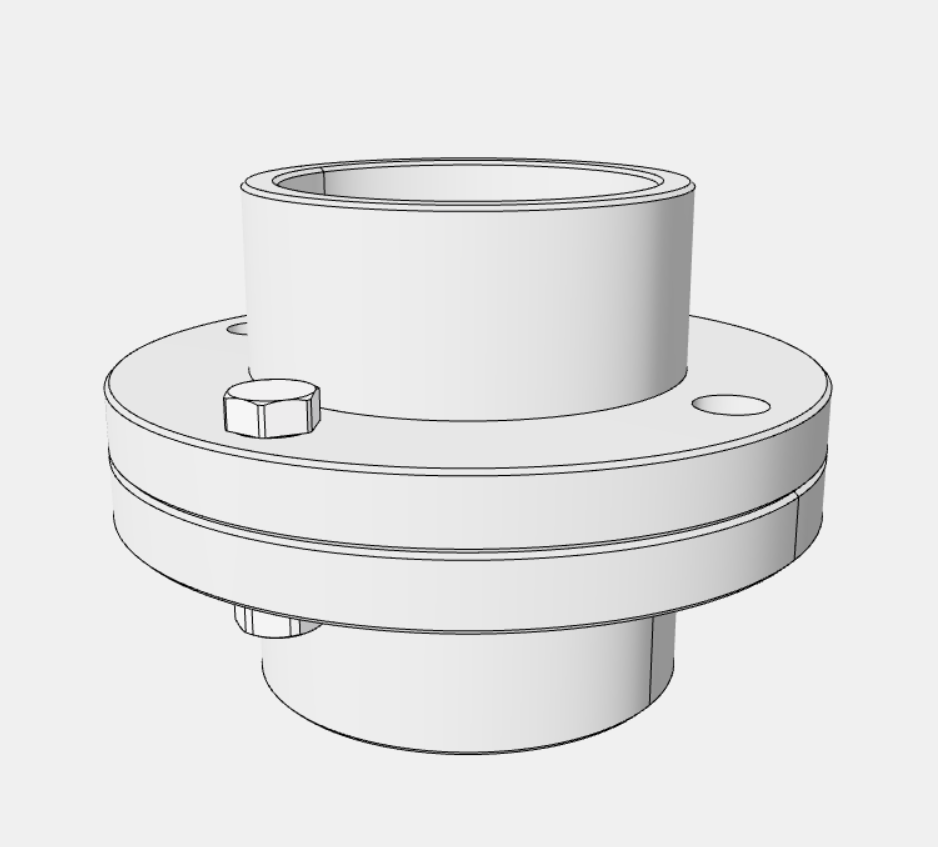
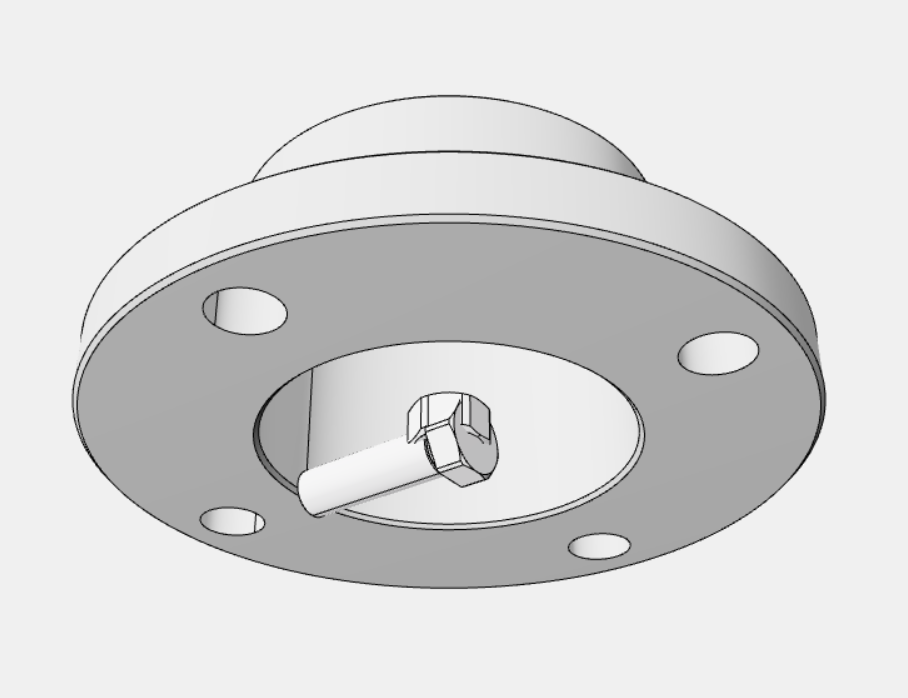
Now we should have an assembly which is fully constrained. Save the assembly like we did with the part and open it in buerligons to see what we have created.

drawing

Assembled flange